Beiträge von kwakster

    Yes, some time ago i even bought a large piece of MDF to possibly make some wheels out of somewhere in the future.
    But at this moment i have some doubts if this material is a truly safe option for that purpose, as i'm not sure if the MDF material will be able to hold up to the centrifugal forces generated by the benchgrinder.
    The last thing i want is that MDF pieces would come flying at me at high speeds in the event that such a wheel disintegrates while spinning at between 1400-1700 rpm, especially since there are no steel guards on the machine (like there would be when using the original stone wheels)


    There are however people who use home made MDF Wheels for sharpening knives:


    Externer Inhalt www.youtube.com
    Inhalte von externen Seiten werden ohne Ihre Zustimmung nicht automatisch geladen und angezeigt.
    Durch die Aktivierung der externen Inhalte erklären Sie sich damit einverstanden, dass personenbezogene Daten an Drittplattformen übermittelt werden. Mehr Informationen dazu haben wir in unserer Datenschutzerklärung zur Verfügung gestellt.


    A small container filled with SiC particles comes with each set of Paper Wheels, and it's enough to re-coat the sharpening Wheel several times.

    Since i started working with Paper Wheels back in 2009 i've experimented with quite a few regritting methods, and the recipe below is what has been working best & longest for me:


    1 - First remove all traces of the old wax layer.
    For this i use a steel wire brush on the spinning Wheel until most is gone, then i shut the machine down and remove the last remnants with an old rag & brake cleaner.


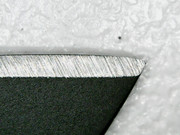
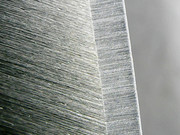
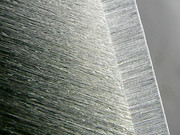
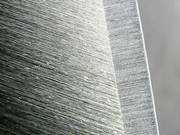
    2 - Then remove all traces of grit & glue until you get to the bare cardboard surface.
    For this i use an old coarse silicon carbide stone first and a semi-coarse diamond stone second, but coarse sandpaper on a piece of wood also works well.


    3 - Take a good quality water resistant wood glue and coat the bare cardboard surface evenly.
    I just use a clean finger while turning the Wheel with my other hand.
    Let dry at least overnight.


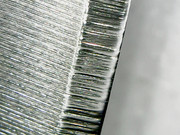
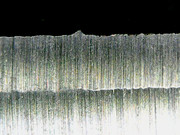
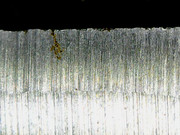
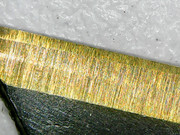
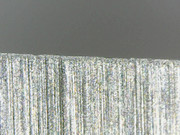
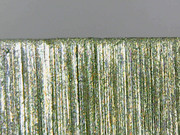
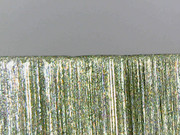
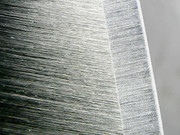
    4 - The next day apply a new and just a little thicker layer of the same glue, and immediately after coat the surface with the grit.
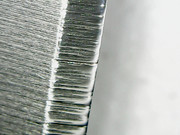
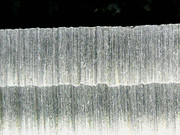
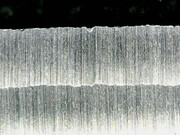
    For this i put a thick layer of grit in a small rectangle box or a deep plastic lid from a jar and gently push the surface of the wheel in it, evenly and all the way around.
    Put the wheel back on the machine and let dry at least overnight.


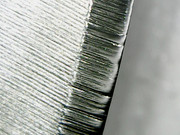
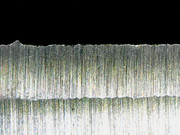
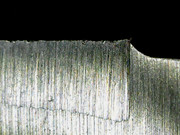
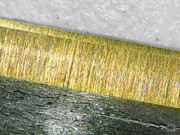
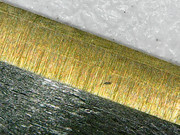
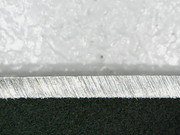
    5 - The next day run the machine with the wheel for just a few seconds so any loose grit particles fly off.
    I also hold my diamond stone shortly to the sides of the Wheel to remove grit particles that stick out there.
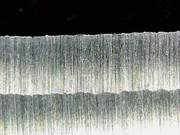
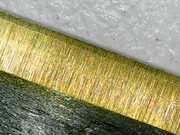
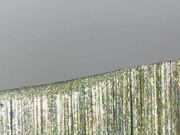
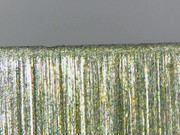
    Stop the wheel and coat the gritted surface with a very thin & even layer of the same wood glue, so thin you can still feel the grit under your fingertips when you're done.
    Let it dry at least overnight.


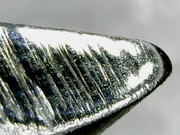
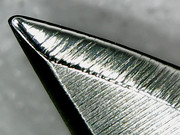
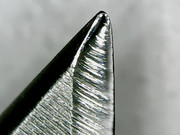
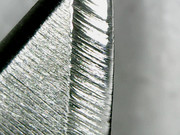
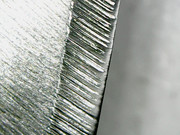
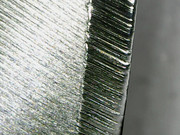
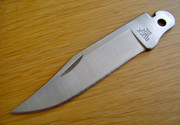
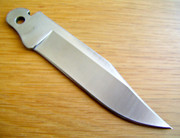
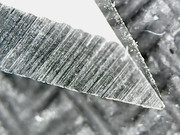
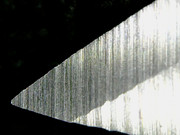
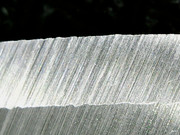
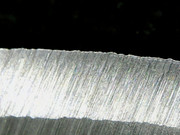
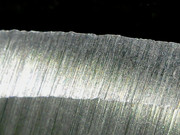
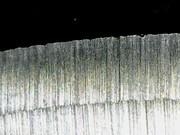
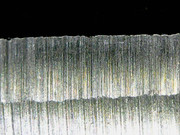
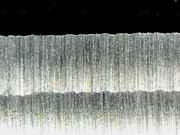
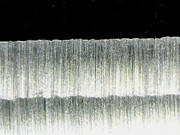
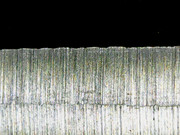
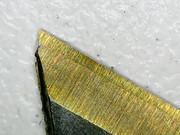
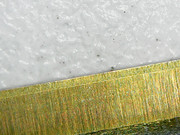
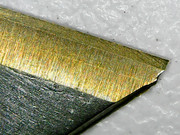
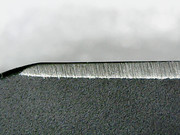
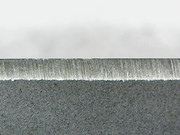
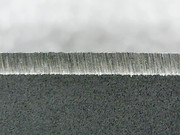
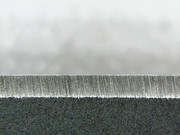
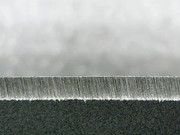
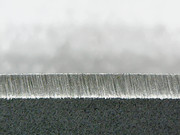
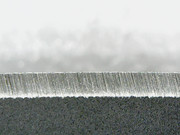
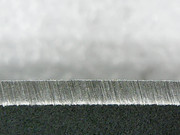
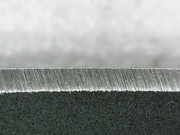
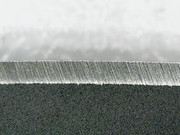
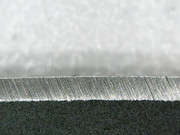
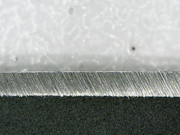
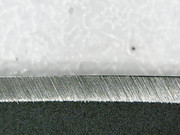
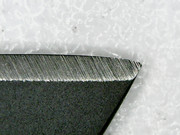
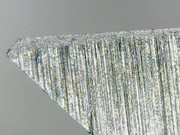
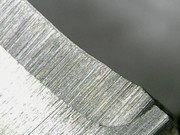
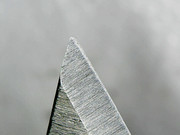
    6 - The next day run the machine and hold an old junk knife a few seconds to the wheel (still without the wax), as this will lay bare the highest points of the grit particles.
    Now you can put some wax on the surface (don't overdo it) and sharpen away.


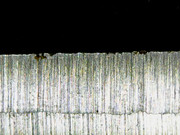
    As you can see the process takes some time, but to me it's worth it.
    The triple layer of glue makes for a much stronger bond of the SiC grit to the cardboard surface compared to just one layer of glue, and each grit particle is also held better in the glue since it's almost completely encapsulated by it, while the glue itself will wear away easily during sharpening.
    This method provides me with a grit Wheel that works perfectly and also lasts longer between regrittings.

    Before i completely finished the edge to 15 micron i decided to use it just once, cutting up a box of mushrooms, some bell peppers, and some onions on my end grain wooden cutting board.
    The 3 pics below show the result: not only microchips, but larger sections of the apex measuring several millimeters have completely broken off.
    I think it's safe to say that a 15 micron edge finish is a bit too coarse for this ceramic material.


    New & unused 420HC blade made in 2010 for a Buck 110, and the edge can shave armhair.
    The first picture was an attempt to get the lens as close as possible to the point of the blade, while at the same time trying to focus as best as i could, so this is about the maximum enlargement.


    Danke für dein Beitrag Trabireiter :thumbup:

    Möglich gibt es kein Beitragen von andere Forum Mitglieder in diesen Thread weil sie denken sie müssen für mir Englisch schreiben, aber ich kann einfaches Deutsch lesen und auch ein bisschen schreiben.
    Nur wenn Ihr unter einander Deutsch schreibt wird es schnell zu schwierig, aber dann gibt es immer noch Google Translate.


    Wenn jemand Fragen oder Bemerkungen hat höre ich es gerne, :)

    Currently busy removing the microchips from the apex with a Paper Wheel coated with 15 micron diamond compound.
    The idea is to finish the new apex with only this compound and then find out how the knife will do with the resulting rather coarse edge (for a ceramic knife)


    Although it remains quite difficult to capture the scratch pattern in pictures, the USB-microscope proves to be very useful in showing a sharpening fault (picture 1) and an extremely small chip remnant (picture 2).
    Picture 5 also shows that the apex is already becoming translucent with this finish at 25 degrees inclusive.


    Making reasonable pictures with an USB-Microscope takes quite a bit of practice, so that's what i'm doing at the moment.
    The idea for this thread is to show some pictures of untouched factory edges from various brands, so feel free to contribute if you have some as well.
    This is the first one, a factory edge with a buffed apex on a Spyderco Paramilitary 2 in CPM-S110V steel and a measured edge angle of 30 degrees inclusive:


    Spyderco aims for 30 degrees inclusive for their factory edges, but that number will vary a bit since most are done by hand on belt sanders.
    In their US facility they recently started using a sharpening robot which has lead to better consistency regarding edge angles.

    The edge can now no longer cleanly cut the skin of most tomatoes, and on some types even downright sawing motions don't work anymore.
    On onions i can feel that initial resistance cutting through the top layers, but on most other foods the knife continues to work well.
    It also still scrape-shaves armhair and slices copy paper just fine, so most non-knife people would still call it quite sharp.


    Although focussing with my new USB-microscope is still quite the challenge i did manage to take some shots of the current edge from tip to heel, to show the edge damage in the form of microchips as well as the sharpening scratches in the bevels.
    My Victorinox magnifying glass had already showed me the larger microchips, but the smaller ones and the scratches which can now be seen clearly had always remained invisible to me.
    It looks like i have jumped the other diamond wheels a bit to soon before finishing with the 1 micron diamond wheel, so apparently there is some room for improvement.


    That depends on how much steel from which steel type i have to remove, as factory edges can be all over the place regarding edge angle, edge finish, and visual appearance.
    When only a slight regrind is needed i just use my Paper Wheel coated with 15 micron diamond compound, which is the same Wheel i also use for the edge finish on a bling & bite edge like this one.
    But when more steel needs to be removed to get to the edge angle i'm after (especially high vanadium carbide steel types) i choose my Rubber Wheel with 230 grit diamond powder or even my Tormek.

    The Manix 2 lightweight in S110V is a superb knife, and it exemplifies Spyderco's motto "simplify and add lightness".
    The model only seems to have two possible disadvantages: it takes up quite a bit of real estate in your pocket, and some people can't seem to get over the fact that it has an ultra lightweight plastic handle, which to them makes the knife feel cheap and not worth the asking price.
    But after providing them with some links to real life tests with this knife some of them change their minds :)


    I do hope however that the factory edges get some more attention in the future, as i already had to resharpen 5 pcs of this model that couldn't even slice copy paper.
    Upon inspection all these edges had visible burr remains and edge angles measured around 35 degrees inclusive.


    This is one of them with it's new bling & bite edge, as i call them: reprofiled to +/- 30 degrees inclusive with 230 grit diamond powder on a Rubber Wheel, refined with 15 micron diamond compound on a Paper Wheel, and deburred with 0,25 micron diamond compound on a second Paper Wheel.
    To me the shiny bevels are actually a side effect, as it's the clean cutting of the large amount of vanadium carbides that i'm after.


    The knife is still being used in our kitchen in exactly the same way as described earlier, but the edge has now lost it's ability to whittle one of my chest hairs towards the root.
    I tried it multiple times on 3 different hairs, but the edge did not catch any of them even once.


    The edge can however still shave the hair on both the back of my hand as well as on my leg on skinlevel, but i have to press the edge on my skin a bit or it will slide over the hairs without cutting them.
    If i do that it will shave a patch clean.
    It will also slice a piece of copy paper to confetti easily, so most non-knife people would still consider the edge to be very sharp.


    Through my Victorinox loupe i can now spot 5 micro-chips, which can be felt on my nail as well.
    However these are not visible with my naked eyes.


    Will continue to use the knife to see how things develop and report back again later.

    Tazkristi from Spyderco headquarters just posted this message on a few forums:


    “Integrity is being good even if no one is watching”….


    We wanted to make everyone aware we are implementing a change for 2016 that you should hear directly from us.
    Spyderco will be implementing a Minimum Advertised Pricing (MAP) Policy with our retailers that will go into effect January 1, 2016.
    This means that there can be no advertisements on-line or in print at a price lower than 40% off of MSRP.
    We are also not raising prices on nearly all of our product line.
    Our policy is slightly unconventional and is designed with everyone in mind.


    We are consumers too, we understand buying products based on important factors like product quality, price, business reputation, customer service, and other factors, and we understand the value of finding that great deal and knowing that you are purchasing a great product from a reliable source.
    We also understand that over the last 40 years, we have cultivated unique partnerships to include consumers, retailers, wholesalers, and suppliers that have all contributed to our success in one way or another.


    Our number one priority is to continue to bring you Reliable High-Performance products.
    We plan to continue growing our innovative product line, finding creative ways to fight counterfeit products in the marketplace and continue strengthening our relationships with those who are committed to the same goals.


    Many of us have our favorite store or website that we purchase from for many different reasons with price being only one of those factors.
    This does not mean that on January 1st, all of our products will suddenly be extremely more expensive, instead what it means is that Spyderco is working with everyone in our network to continue bringing our products to you at fair prices through your favorite retailers.
    This is a work in progress and we will continually review and apply our CQI – Constant Quality Improvement philosophy in the coming months.
    The Spyderco Crew thanks you for your undeniable loyalty and continued support !